Make your own Climbing Holds!
After building a climbing wall on a budget, Emily and I decided to make our own holds. We tried the schemes described at various places on the internet such as Bondo putty, wooden holds, silicone molds with fiberglass resin, etc... They worked, but none to any great ease or satisfaction. The Bondo Fiberglass resin + sand is by far the best solution, and is close to what the manufacturers use. The limiting factor, aside from our ineptitude as hold designers, was the high cost of making the silicone molds. It costs about $5+ to make a silicone mold. It also takes a few hours to make a prototype and then cover it in silicone. Add to that a few days for drying and you're about ready to scrap the whole hold buissness and head down to REI.
Well, don't despair, as there is a better way. The following method is great for duplicating commerical holds, or making your own free form holds without a "prototype". An added bonus is that you can use these molds for as few as a single hold, so your wall will have variety.
Here's what you need (can all generally be found at the hardware store):
- Block of clay ($5-15)
- Bondo Fiberglass Resin (Get the gallon $20-25)
- Extra Fibergass Resin Fixer ($2, get one or two extra per gallon of resin)
- Play Sand or fine Sillica sand (better) $5
- 3/8" Washers ($0.05)
- 3/8" Mason drill bit ($4)
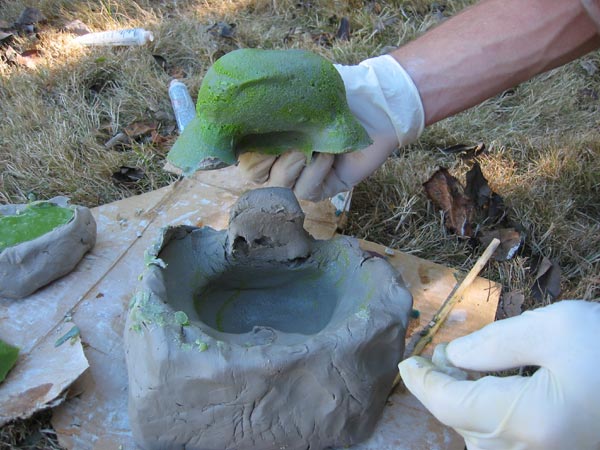
Step 1. Get a big block of clay (6" x 6" by 12", 20lb?). It doesn't have to be too quality clay (like for pottery), because you won't be baking it. Find a commerical hold and cut a slice off of the clay deep enough to accomidate the depth of the hold. Push the hold strait down into the clay such that the back of the hold is facing up. Alternatively, create a free formed depression in the clay and add texture to it with a commerical hold (the texture is important!). Then, carefully remove the hold from the clay. Try not to smudge the texture off, and fill in any creases that will translate into sharp bumps on the final hold. If the plug from the bolt hole breaks off and stays in the commerical hold, make a new one by rolling a peg. Finally, place a 3/8" washer on top of the bolt-hole peg (this is also important!).

A completed mold.
Spray the mold with WD-40. This will make it easier to seperate from the clay once the hold hardens.

Spray the hold with WD-40.
Step 2. Now comes the fun part: mixing up the bondo resin. This stuff is STINKY, so do it outside or in a ventilated space and definitely wear some sort of respirator. Another good thing is to use a fan to blow the fumes away from you. Estimate how much sand would fill up the entire mold, and roughly measure that volume of sand (in ounces). You will then mix up the right amount of bondo fiberglass resin to match the quantity of sand. You want about a 60% sand and 40% bondo mix.
Start by mixing the resin and the fixing agent (drop by drop) before adding the sand. It is important to measure the volume of resin carefully so that you can calculate the right number of drops of fixer to add. The more fixer you add the faster the holds will setup. I generally use the amount suggested, but try not to use less. Work fast now, as you have about 15 minutes before the resin begins to setup!

Yogurt cups make good measured volume resin cups. Milk crates make for
good sand+resin mixing boxes. You can reuse these a few times.
If you want to color your holds, acrylic paint works best. Add it in also before the sand.

Get creative with colors!
Start adding the sand slowly, stirring it in as you go. Try to avoid getting pockets of dry sand. The 60/40 mix is a good general rule, but keep adding sand until it seems as if more sand would cause the mix to be too dry to work with.

Step 3. Now pour the mix into your molds. It is good to have some small holds or jibs around just in case you have too much mix. Pour up to the top of the mold.

Let the holds cool and setup for 1-3 hours, depending on how much fixer you added. It's ready when the top is hard, but the hold is still a bit warm. However, if you pull it out too early, it can mess up the texture.

Crack the mold off the hold.

and all the way out. Note: it is not nessisary to break the mold doofus!
Another hold with an pocket on top.
At this point the resin-sand mix is still a little soft. You can cut off any irregularities with a knife, and smooth off the back of the hold by scraping it along any rough flat surface (the curb works well).
Step 4. Now take a drill press, or hand drill with a 3/8" mason bit and drill down past the washer and though the starter hole created by the "bolt peg" referred to above. Let your hold harden for a few hours, bolt it up on the wall and climb on!
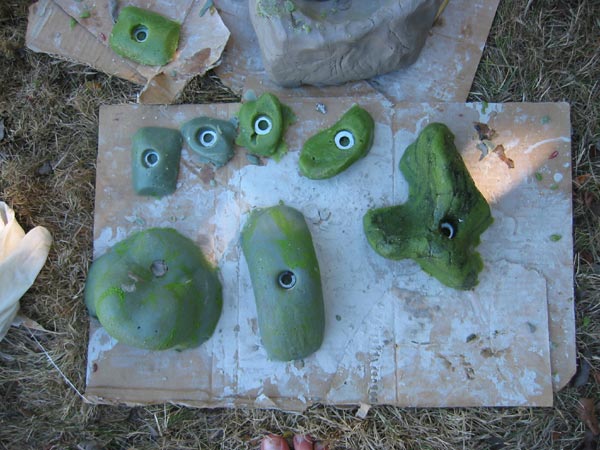
Holds ready to be drilled.
Comments
- A gallon of resin will make a LOT of mid-sized holds. I think it ends up costing somewhere around $0.25-0.50 per hold.
- The extra fixer for the resin is key. They do not ship the gallon with near enough.
- You can make swirled holds by making up two mixtures of sand-resin, and pouring them into the mold at the same time. Just make sure the mixes have about the same amount of fixer in them.
- If something doesn't make sense, feel free to email me at dave@alpinedave.com